Image Effects and Entity Highlighting
This weekend work went into adding a visual outline to the selected entity. While entity selection has been a feature since the early days of the editor, a cue to show the user the current selected entity visually goes a long way in terms of usability.
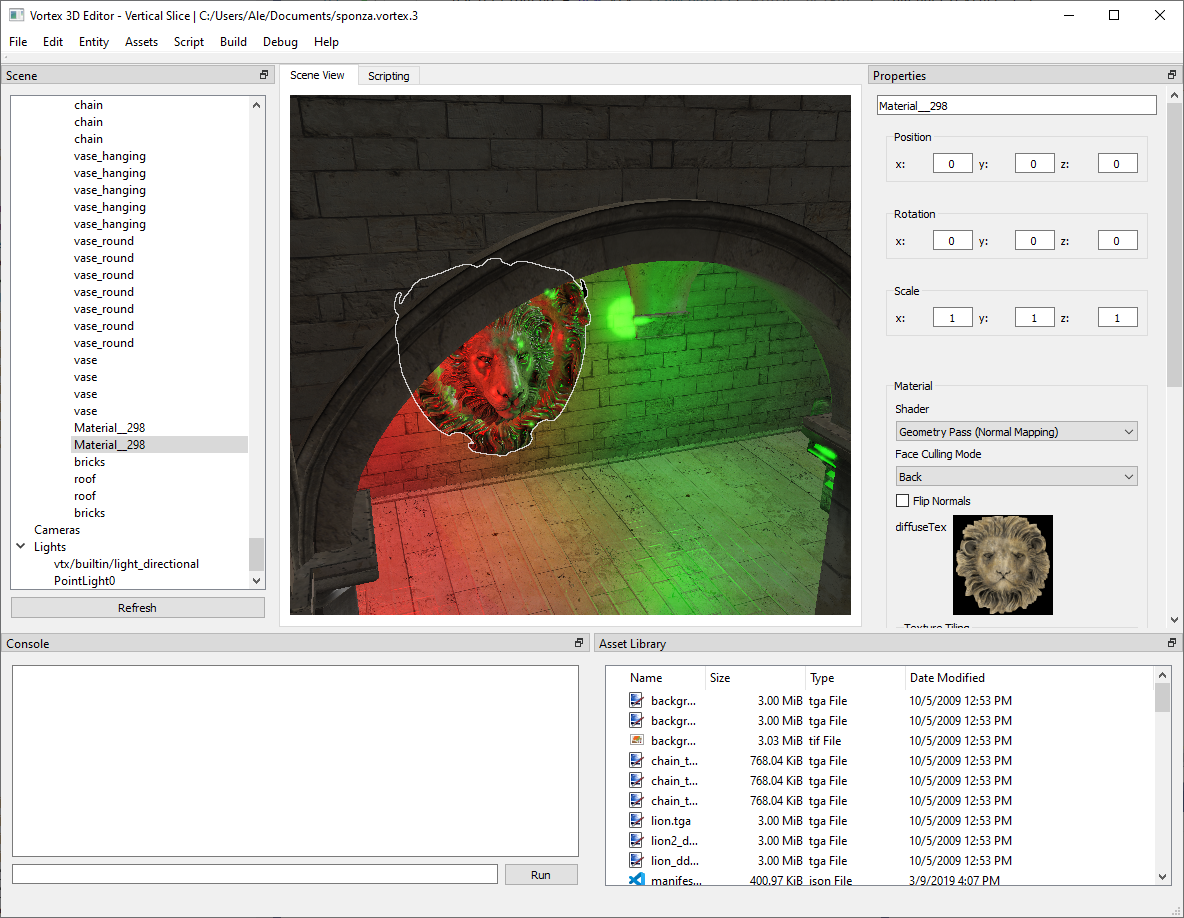
Different ideas were considered for implementing this effect. In the end I decided to go with a post-processing approach that implements a Sobel Operator to highlight the entity’s silhouette.
This required the introduction of the new concept of ImageEffects In Vortex. ImageEffects are a mechanism through which custom post-processing effects can be registered with the Deferred Renderer. They allow modifying the render before it’s blit to the system framebuffer.
Creating ImageEffects
The interface for defining image effects is the ImageEffect class. These can just be constructed once (passing in any arguments to the constructor).
It provides convenience functions for initializing (once registered) and resizing (to respond to framebuffer resize events).
The key function is apply, however:
/**
 * Apply this effect. It is mandatory that the effect writes to the pDst framebuffer.
 * the most minimal effect will just bind pDst and call pRenderer->blitTexture(pSrc);
 * @param pRenderer renderer that is drawing the current scene.
 * @param pSrc source texture containing the current image.
 * @param pDst destination framebuffer. It is mandatory to blit to this framebuffer.
 **/
virtual void apply( vtx::IRenderer* pRenderer, vtx::Texture* pSrc, vtx::FrameBuffer* pDst ) = 0;
As described in the comment, it is very important that image effects do not break the chain. The passed in source image needs to be blit to the destination framebuffer at the minimum. If not blit, this will take down the entire rendering process, as the results of the renderer will not be stored in the framebuffer.
The Deferred Renderer provides a convenience function for easily blitting the source image into the destination framebuffer unaltered.
pRenderer->blitTextrue(pSrc);
Implementing the Effect
With this in place, we can now implement the EntityHighlightImageEffect. All we have to do is make sure that it is aware of the currently selected entity and then, in the apply method, implement the logic necessary to calculate the outline.
The implementation can be broken down as follows:
- In the initialize() method, create an auxiliary framebuffer with a color attachment for the intermediate renders.
- Implement the apply() method to perform a render pass into the intermediate framebuffer, drawing the highlighted entity into the texture.
- Bind the passed-in framebuffer and blit onto it with a custom material that calculates the Sobel Operator and blends with the provided source texture.
- And we’re all done! Leverage the resize() method to respond to framebuffer dimension changes.
The image effect can be used to control the configuration of the effect, such as the highlighting color and effect thickness. This is possible because the image effect has full control over the shader used for blitting.
Overall I’m very happy with the results. It was tricky to arrive to an ImageEffect interface that I felt could be extensible enough for any possible future effects, but after several different attempts, I think we found a good general solution.
That’s going to be it for this week.
Stay tuned for more!